Beginner Step By Step Friendship Bracelet Instructions Printable
Are you looking for a fun and creative way to connect with your friends? Friendship bracelets are the perfect solution! Not only are they a great way to show someone you care, but they also provide a creative outlet for self-expression. If you’re new to making friendship bracelets, don’t worry – we’ve got you covered with beginner step-by-step instructions that are easy to follow.
Getting Started with Friendship Bracelets
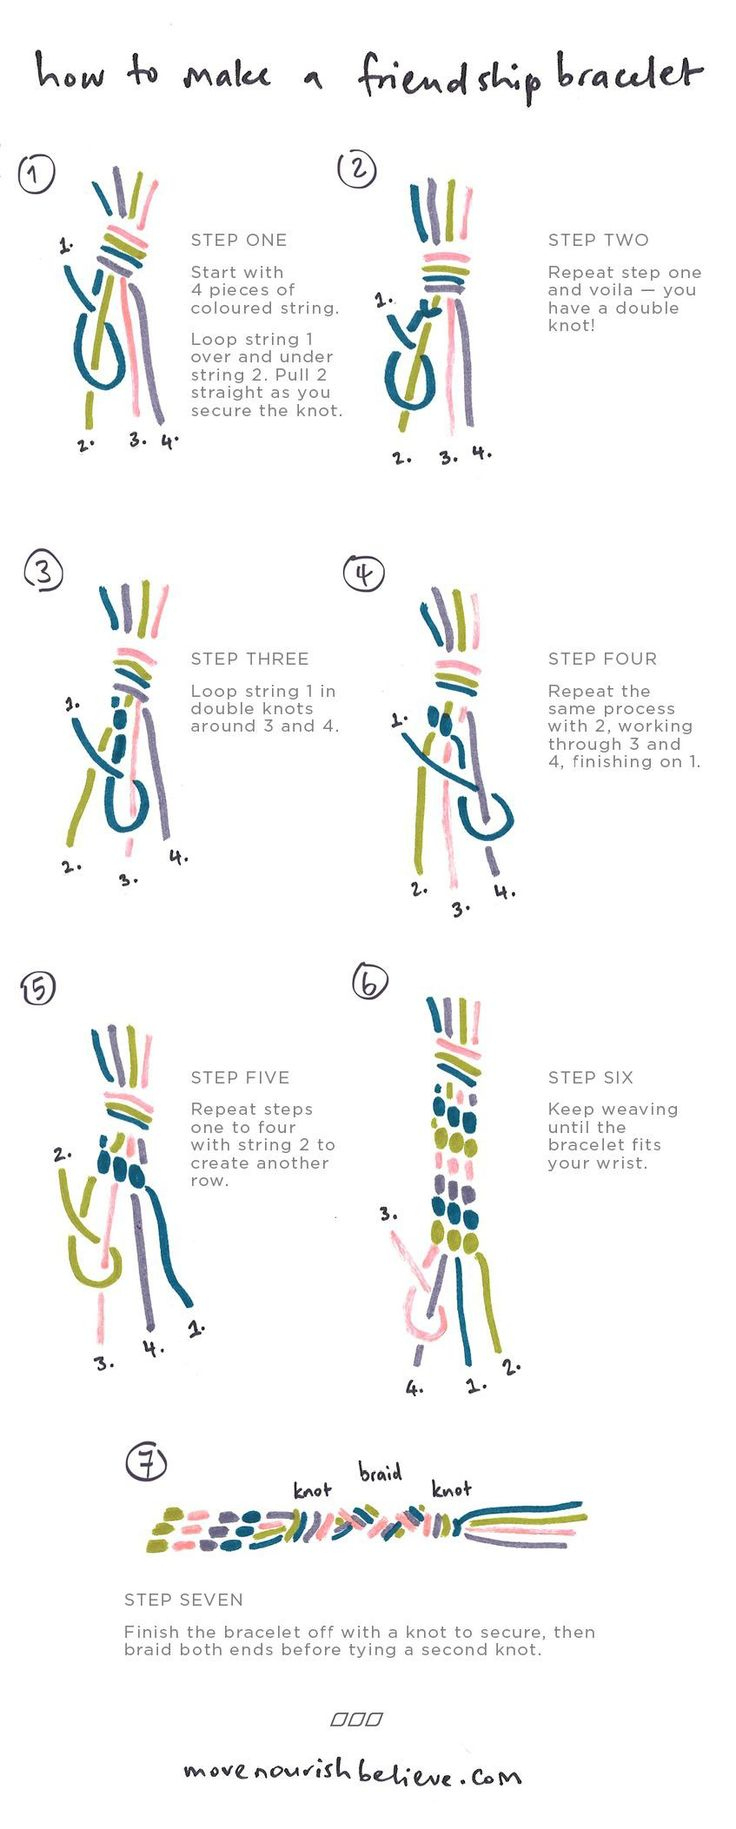
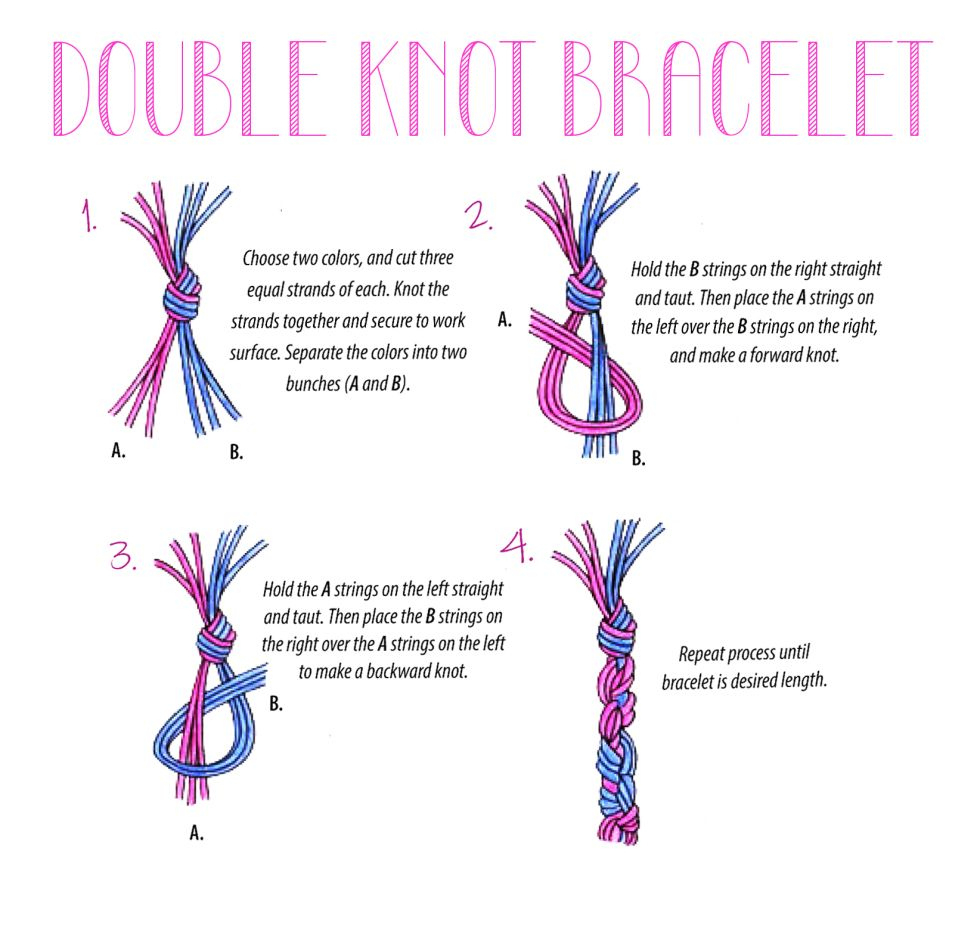
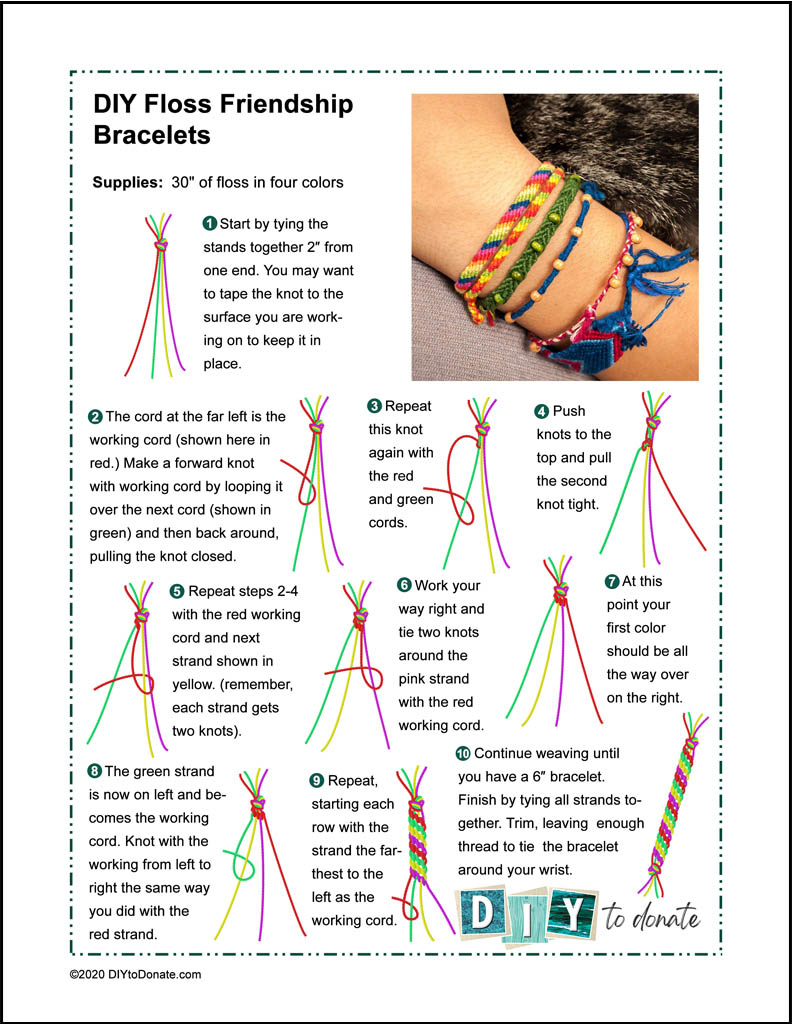
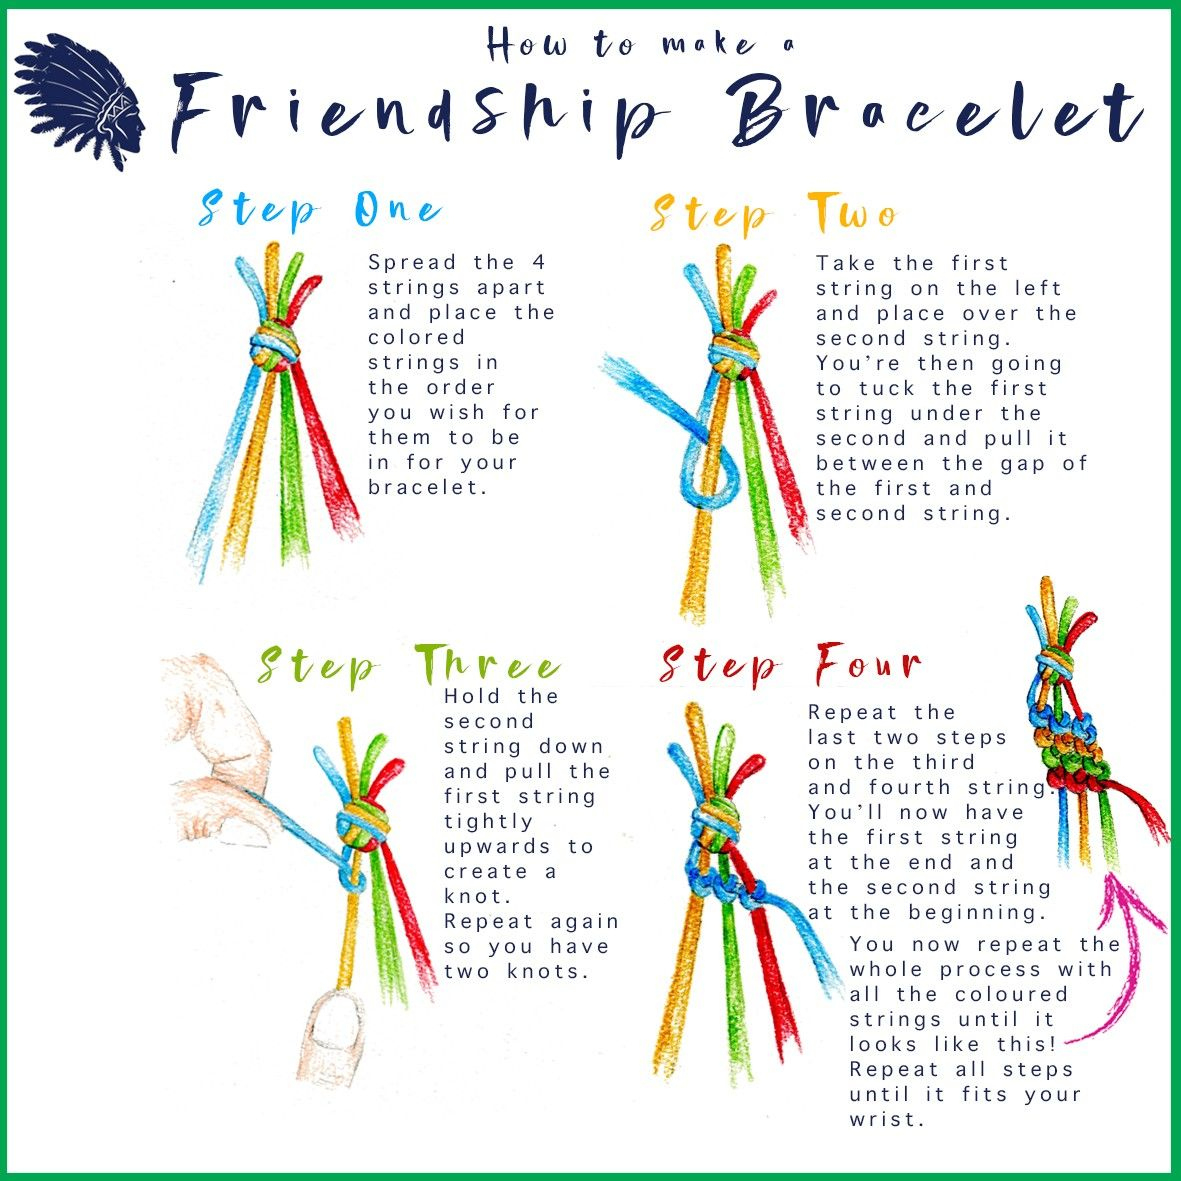
To begin making your friendship bracelet, you’ll need a few simple supplies: embroidery floss in your desired colors, scissors, tape or a safety pin, and a flat surface to work on. Once you have your supplies ready, choose the colors you want to use for your bracelet. You can stick to traditional colors or mix it up with a rainbow of hues – the choice is yours! Next, cut a piece of embroidery floss about 60 inches long, fold it in half, and tie a knot at the top to create a loop.
Now it’s time to start creating your bracelet! Separate your floss into two sets of colors, with two strings in each set. Take the outer string from the left set and cross it over the inner string to create a 4 shape. Then, pull the outer string under the inner string and through the loop created by the 4 shape. Repeat this process with the right set of strings, crossing the outer string over the inner string to create a backwards 4 shape. Continue this pattern, alternating between the left and right sets of strings, until your bracelet reaches the desired length.
Adding Personalized Touches
Once you’ve finished braiding your friendship bracelet, it’s time to add some personalized touches to make it truly unique. You can incorporate beads, charms, or even initials to customize your bracelet and make it extra special for your friend. Simply thread your chosen embellishments onto the strings before tying off the ends of your bracelet. You can also experiment with different braiding techniques, such as adding knots or twists, to create a one-of-a-kind design.
Before giving your friendship bracelet to your friend, take a moment to tie off the ends securely. You can either knot the ends or create a loop and tie a bow for a more adjustable fit. Once your bracelet is finished, present it to your friend with a smile and watch as their face lights up with joy. Making friendship bracelets is not only a fun and creative activity, but it’s also a meaningful way to show someone you care. So grab your supplies and get started on crafting your own special bracelets today!
Related Printables..
Image Copyright Disclaimer: All images displayed on this website are presumed to be either in the public domain or used under the premise of fair use for editorial commentary. If you are the rightful copyright owner of any image herein and wish for it to be removed, please contact us with verification of your ownership. We will act promptly to resolve the matter.
Beginner Step By Step Friendship Bracelet Instructions Printable